Automation rules feature allows you to create rules to automate specific actions when certain events occur.
Currently, we only support the following events:
When submission is created
When a custom field is updated
Based on the type of your form question or custom field, you can create rules that, when triggered, can perform specific actions. We currently support the following actions:
Send email: This could be the form creator, submitter, workspace members, or any specific email address.
Send SMS: This could be either to the form submitter or any specific phone number.
Send to API: Send the data to a specific API endpoint.
Set up an automation rule to send email
Consider the following use case:
You are the HR manager of a company that has created an application form for potential interns to apply at your company. Based on the data submitted by the applicants, you have to decide if the applicant qualifies for the interview. If the applicant is a possible fit, then you need to send him an email with details of the interview. Plus, you would also need to send an email to the interviewer with the details of this applicant.
Here's how you can automate this using NeetoForm's automation rules:
(When a custom field is updated by any)
Firstly, you must create a custom field "Qualification status" with the field type single option and add Passed and Failed as options.
Go to Settings from the top menu, under General, click on Automation rules, and click on Add new rule.
Add in a name for the rule and ensure that the status is active.
Under When, ensure "When a custom field is updated by any" is present, and then click on the + icon.
Set the condition as "and when Qualification status is passed"
-
Under Then, set the following action:
send email to form submitter whose email is email address with the following message
and then send email to form creator with the following message
Add in the subject and body for each of the emails and save the rule.
Your saved automation rule should look something like the following:
Now, whenever you mark a submission as Passed by updating the "Qualification status" custom field, the above automation rule will get triggered and perform the actions.
Consider another scenario:
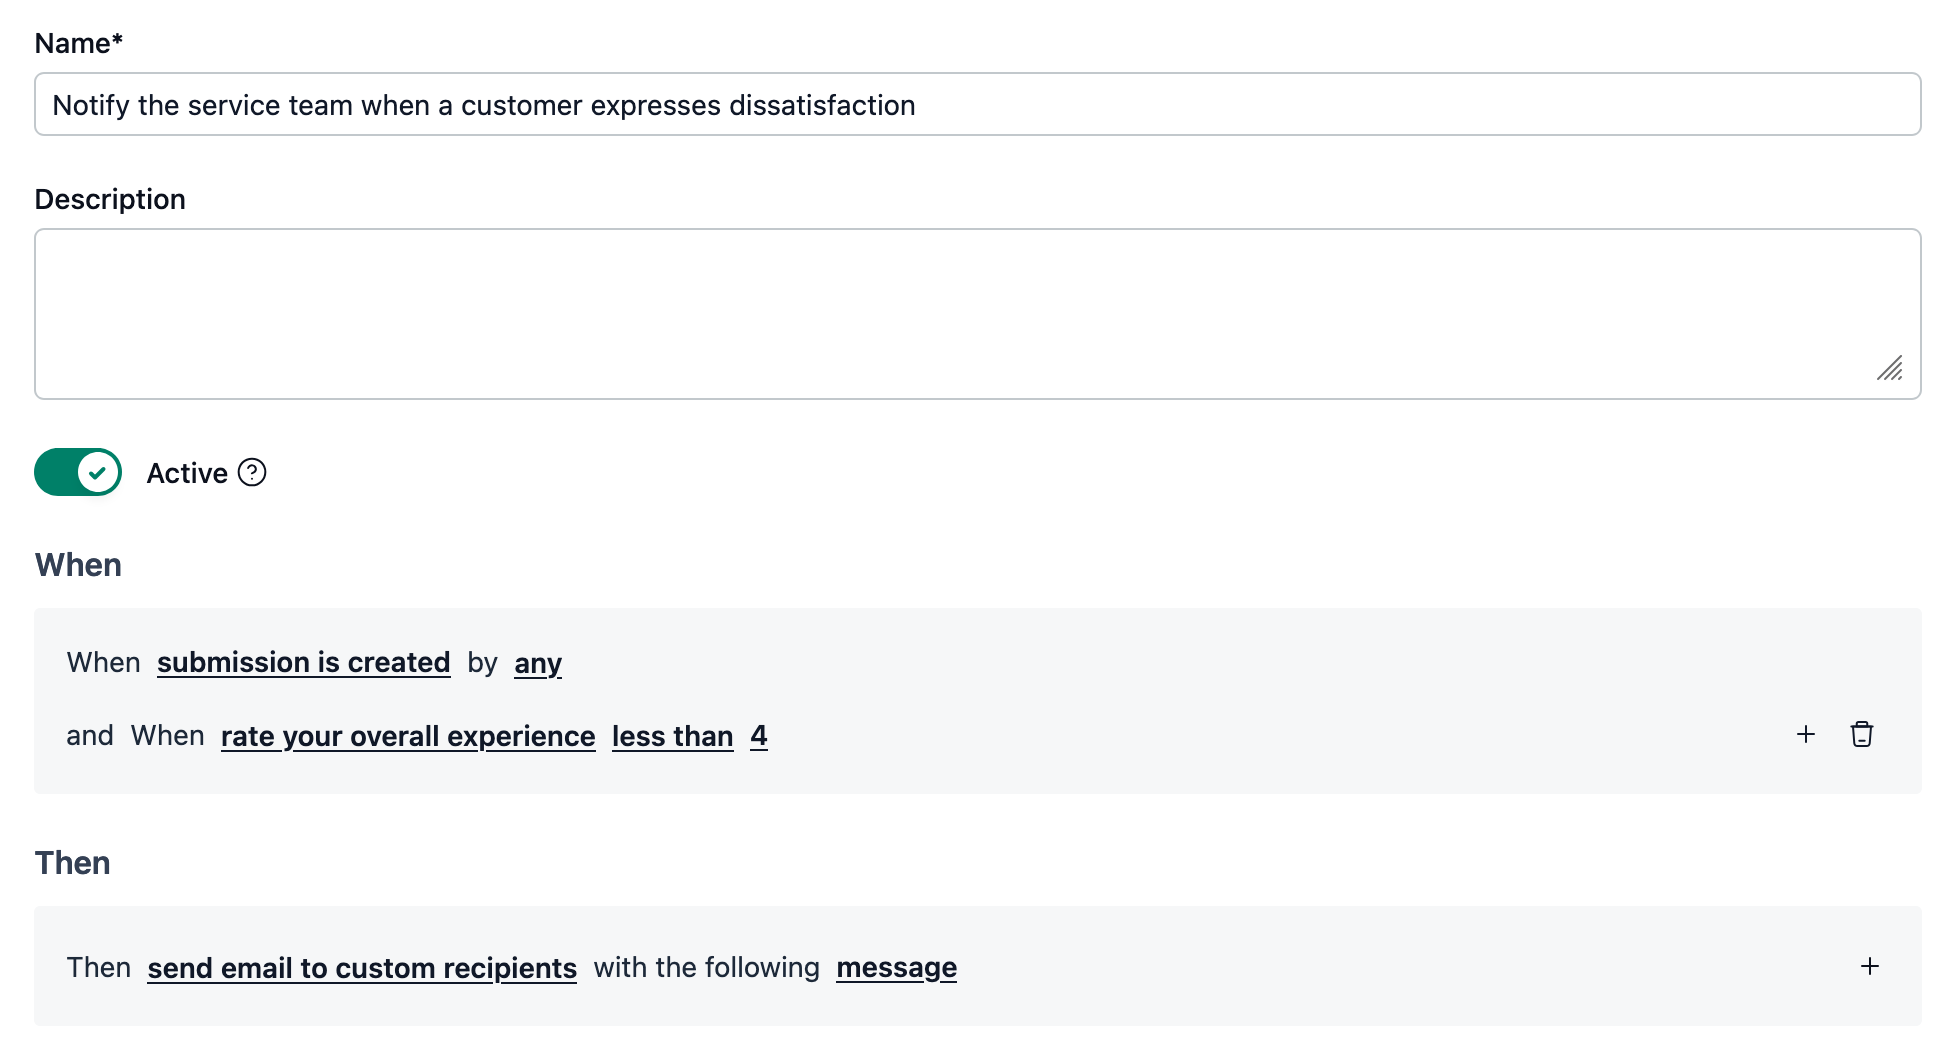
You are the customer experience manager at a life insurance firm responsible for enhancing client satisfaction. Once customers receive their policy approvals, they are asked to complete a feedback survey. If a customer gives a low rating, you should notify the service team via email with details about the feedback so they can address these issues and improve the overall experience.
Here's how you can automate this using NeetoForm's automation rules:
(When submission is created by any)
Create question with type "Opinion scale" and label "Rate your overall experience".
Go to Configure from the top menu, under General Configurations, click on Automation rules, and click on Add new rule.
Add in a name for the rule and ensure that the status is active.
Under When, ensure "When submission is created by any" is present, and then click on the + icon.
Set the condition as "and when rate your overall experience less than 4."
-
Under Then, set the following action:
send email to custom recipients with the following message:
Provide the email IDs of the service team members.
Add in the subject and body for the email and save the rule.
Your saved automation rule should look something like the following:
Set up an automation rule to send SMS
Consider the following use case:
You are a professor at a university that has created a form where students have to submit their assignments. Based on the responses submitted by the students and your evaluation, you have to send an SMS to the students if they need to resubmit who failed to make the cutoff.
Here's how you can automate this using NeetoForm's automation rules.
Firstly, you need to create a custom field, "Evaluation status," with the field type single option and add Accepted and Unsatisfactory as options.
Go to Configure from the top menu, under General Configurations, click on Automation Rules, and click on Add New Rule.
Add in a name for the rule and ensure that the status is active.
Under When, ensure "When custom field is updated by any" is present, and then click on the + icon.
Set the condition as "and when Evaluation status is unsatisfactory."
-
Under Then, set the following action:
Send an SMS to the form submitter whose phone number is phone number with the following message.
Add in the body for the SMS and save the rule.
Your saved automation rule should look something like the following:
Now, whenever you mark a submission as Unsatisfactory by updating the "Evaluation status" custom field, the above automation rule will get triggered and perform the actions.
You can add multiple automation rules. For example, if you want to send SMS messages to students whose assignments have been marked as Accepted, you can create a separate automation rule.
Set up an automation rule to send submission data to an API
Consider the following use case:
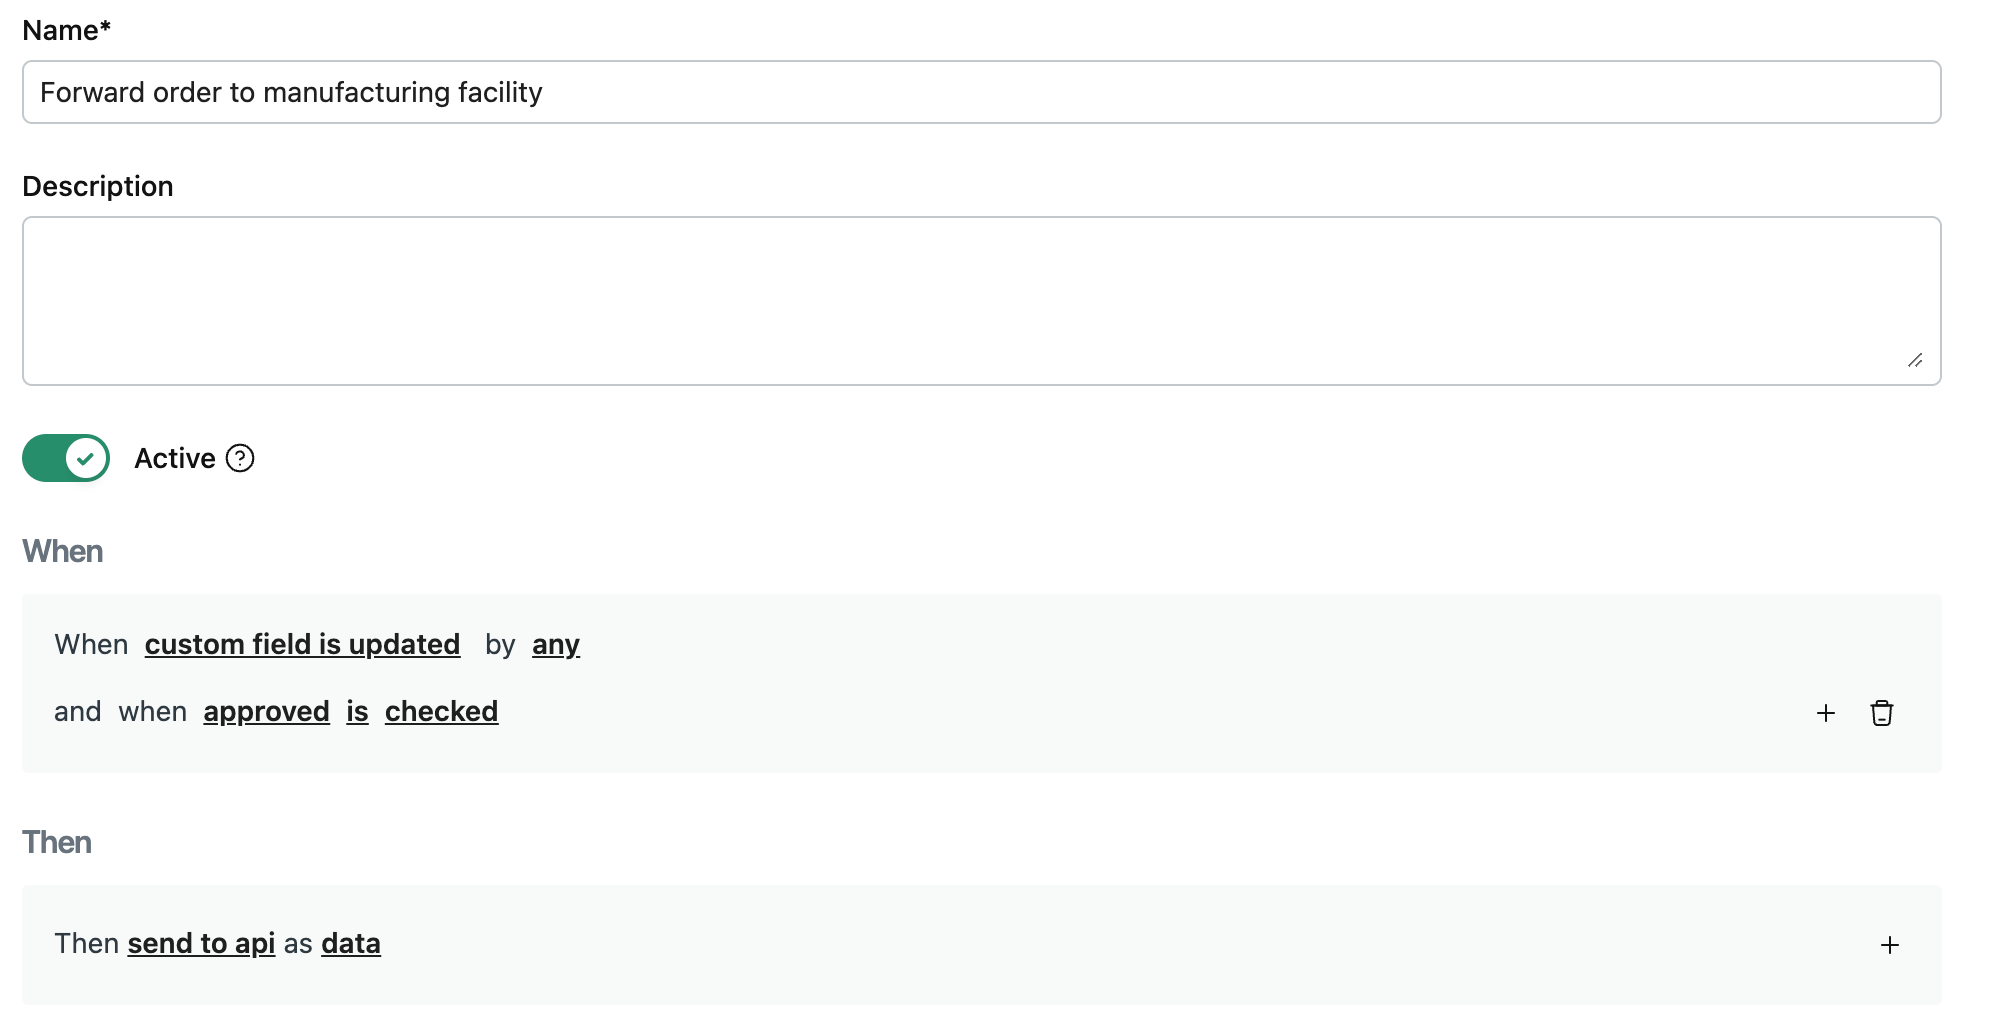
You have a form that accepts orders for T-shirts with customizable prints. Your customers can submit their designs and/or include taglines to be printed on the T-shirts. Based on the responses submitted by your customers, you first have to evaluate the feasibility of the design. If everything looks good, then you need to forward the order to a third party or your manufacturing facility that accepts orders via an API.
Here's how you can automate this using NeetoForm's automation rules:
Firstly, you must create a custom field "Approved" with the field type checkbox.
Go to Configure from the top menu, under General Configurations, click on Automation rules, and click on Add new rule.
Add in a name for the rule and ensure that the status is active.
Under When, ensure "When custom field is updated by any" is present and then click on the + icon.
Set the condition as "and when approved is checked"
-
Under Then, set the following action
send to api as data
Add in the endpoint URL. By default, all the fields present in the form and metadata are included in the body of the API request. You can customize this body to include additional data or modify its structure using the built-in editor. Optionally, enable custom headers and specify them as key-value pairs. Save the rule.
Your saved automation rule should look something like the following:.
Now, whenever you mark a submission's "Approved" custom field as checked, it will send the configured payload along with the custom headers to the specified endpoint.
Troubleshooting
My automation rules are not working
Ensure that your automation rule is active. Inactive automation rules won't be triggered.
Ensure that your form is not archived or disabled. Automation rules won't be triggered for archived forms or disabled forms.
For automation rules involving sending emails to form submitters, ensure you have an Email field in your form.
For automation rules involving sending SMS, ensure that you have a Phone Number field in your form along with Twilio integration enabled.
My automation rules are not getting executed immediately
We execute the automation rules after a delay of 2 minutes. Let's say you wanted to mark a submission as Qualified, but by mistake, you marked it as Failed. This can trigger the wrong automation rule. The 2-minute delay ensures that you have enough time to correct the mistake. If the same submission is marked as Qualified, we will trigger the automation rule matching the Qualified scenario. The delay can't be less than 1 minute.
Why can’t I find some of my questions while specifying conditions?
Only published questions are available for selection when specifying conditions. If a question is published but still not listed, please check if its type is supported. Here’s the list of supported question types:
Full name
Email address
Phone number
Address
Text input
Number
Dropdown
Single choice
Multi choice
Yes/No
Opinion scale
Star rating
Calculated Field
The following question types are not supported :
Date and time
Terms & Conditions
File upload
Matrix
Take photo
Signature
YouTube video embed
Unique ID
Captcha


