
NeetoForm allows you to embed your forms directly into your website. Instead of sending users to an external link, they can submit information while staying on your site, providing a seamless user experience and increasing form completion rates.
How to access embed options?
Go to the Forms tab in your NeetoForm dashboard.
Click on the specific form you wish to embed.
Navigate to the Share tab at the top of the form editor.
Select Embed on a webpage.
From here, you can choose your embedding style and configure the display options.
Embed types
NeetoForm provides four ways to integrate the form into your site. Choose the one that fits your layout best:
1. Inline embed
This displays the form directly inside your webpage as part of the page layout. The form becomes a natural part of your page content and is always visible without any clicks.
2. Pop up via sticky button
This adds a floating button to your webpage. When clicked, the form opens in a pop-up window, allowing users to complete it without leaving the page. This is best for marketing landing pages where you want a "Start Survey" or "Get Quote" option to stay visible as the user scrolls.
3. Popup via custom trigger
This gives you the most control, as you can link the NeetoForm pop-up to any clickable element on your website—such as a navigation link, a call-to-action link, or your own custom-styled button.
How to set it up:
Create your element: Add a button or element to your website's code and give it a unique ID (e.g.,
my-form-trigger).-
HTML
<button id="my-form-trigger">Start Survey</button> Select the option: In NeetoForm, select Popup via custom trigger.
Link the ID: Enter your unique ID (e.g.,
my-form-trigger) into the Element ID field in NeetoForm.Embed: Copy the Embed code and paste it into your website.
-
Important note on the Embed code: For demo purposes, the code you copy includes a sample button element. You can remove this button from the Embed code safely once you set up your own element to trigger the modal:
  <!-- This is a demo button, you can use any element on your website instead. -->
  <!-- <button id="open-popup-button">Click to open popup</button> -->
4. Iframe embed
This embeds the form inside a fixed iframe on your page. Unlike the Inline embed (which adapts to your page's layout), the iframe provides an isolated, predetermined window into the form interface that does not automatically adjust its size.
Customization options ✨
These options allow you to fine-tune the visual layout of your embed for a seamless, professional look.
1. Dynamic height
Dynamic height ensures the embed's height automatically adjusts in real-time to fit the content being displayed. This is key because it eliminates internal scrollbars. This feature is enabled by default for Inline embeds. You can disable this feature using the toggle switch if you prefer a fixed height.
Iframe embeds are designed for websites that restrict third-party scripts. Since dynamic height calculation requires scripts to communicate the content size to your website, this feature isn't supported for iframe embeds.
2. Hide title
This setting removes the default form title from the top of the embedded form. When enabled, the form loads without its standard header section, giving you more control over how the form fits into your page design.
This option is especially useful when your webpage already provides its own heading or context—such as “Contact Us,” “Register for the Event,” or “Feedback Form.” By hiding the built-in title, you avoid duplicate headings and maintain a cleaner, more cohesive visual layout.
3. Align content to left
This feature controls the horizontal alignment of your embedded form within its container. When enabled, it removes the default centering, maximum-width constraint, and additional internal spacing. This allows the form to use the full available width and align naturally with the left edge of your page layout. This setting is perfect for modern, minimalist layouts, as it ensures the form aligns seamlessly with your website's main text and grid structure.
4. Transparent background
This setting removes the default background color of the embedded form, making the form’s background fully transparent. When enabled, the form seamlessly adopts your webpage’s background—whether it’s a solid color, gradient, image, or custom pattern.
This option is ideal when you want the form to blend naturally into your site’s design without a separate container or boxed appearance. It helps maintain visual consistency, especially on pages with custom backgrounds or uniquely styled sections.
Advanced configuration
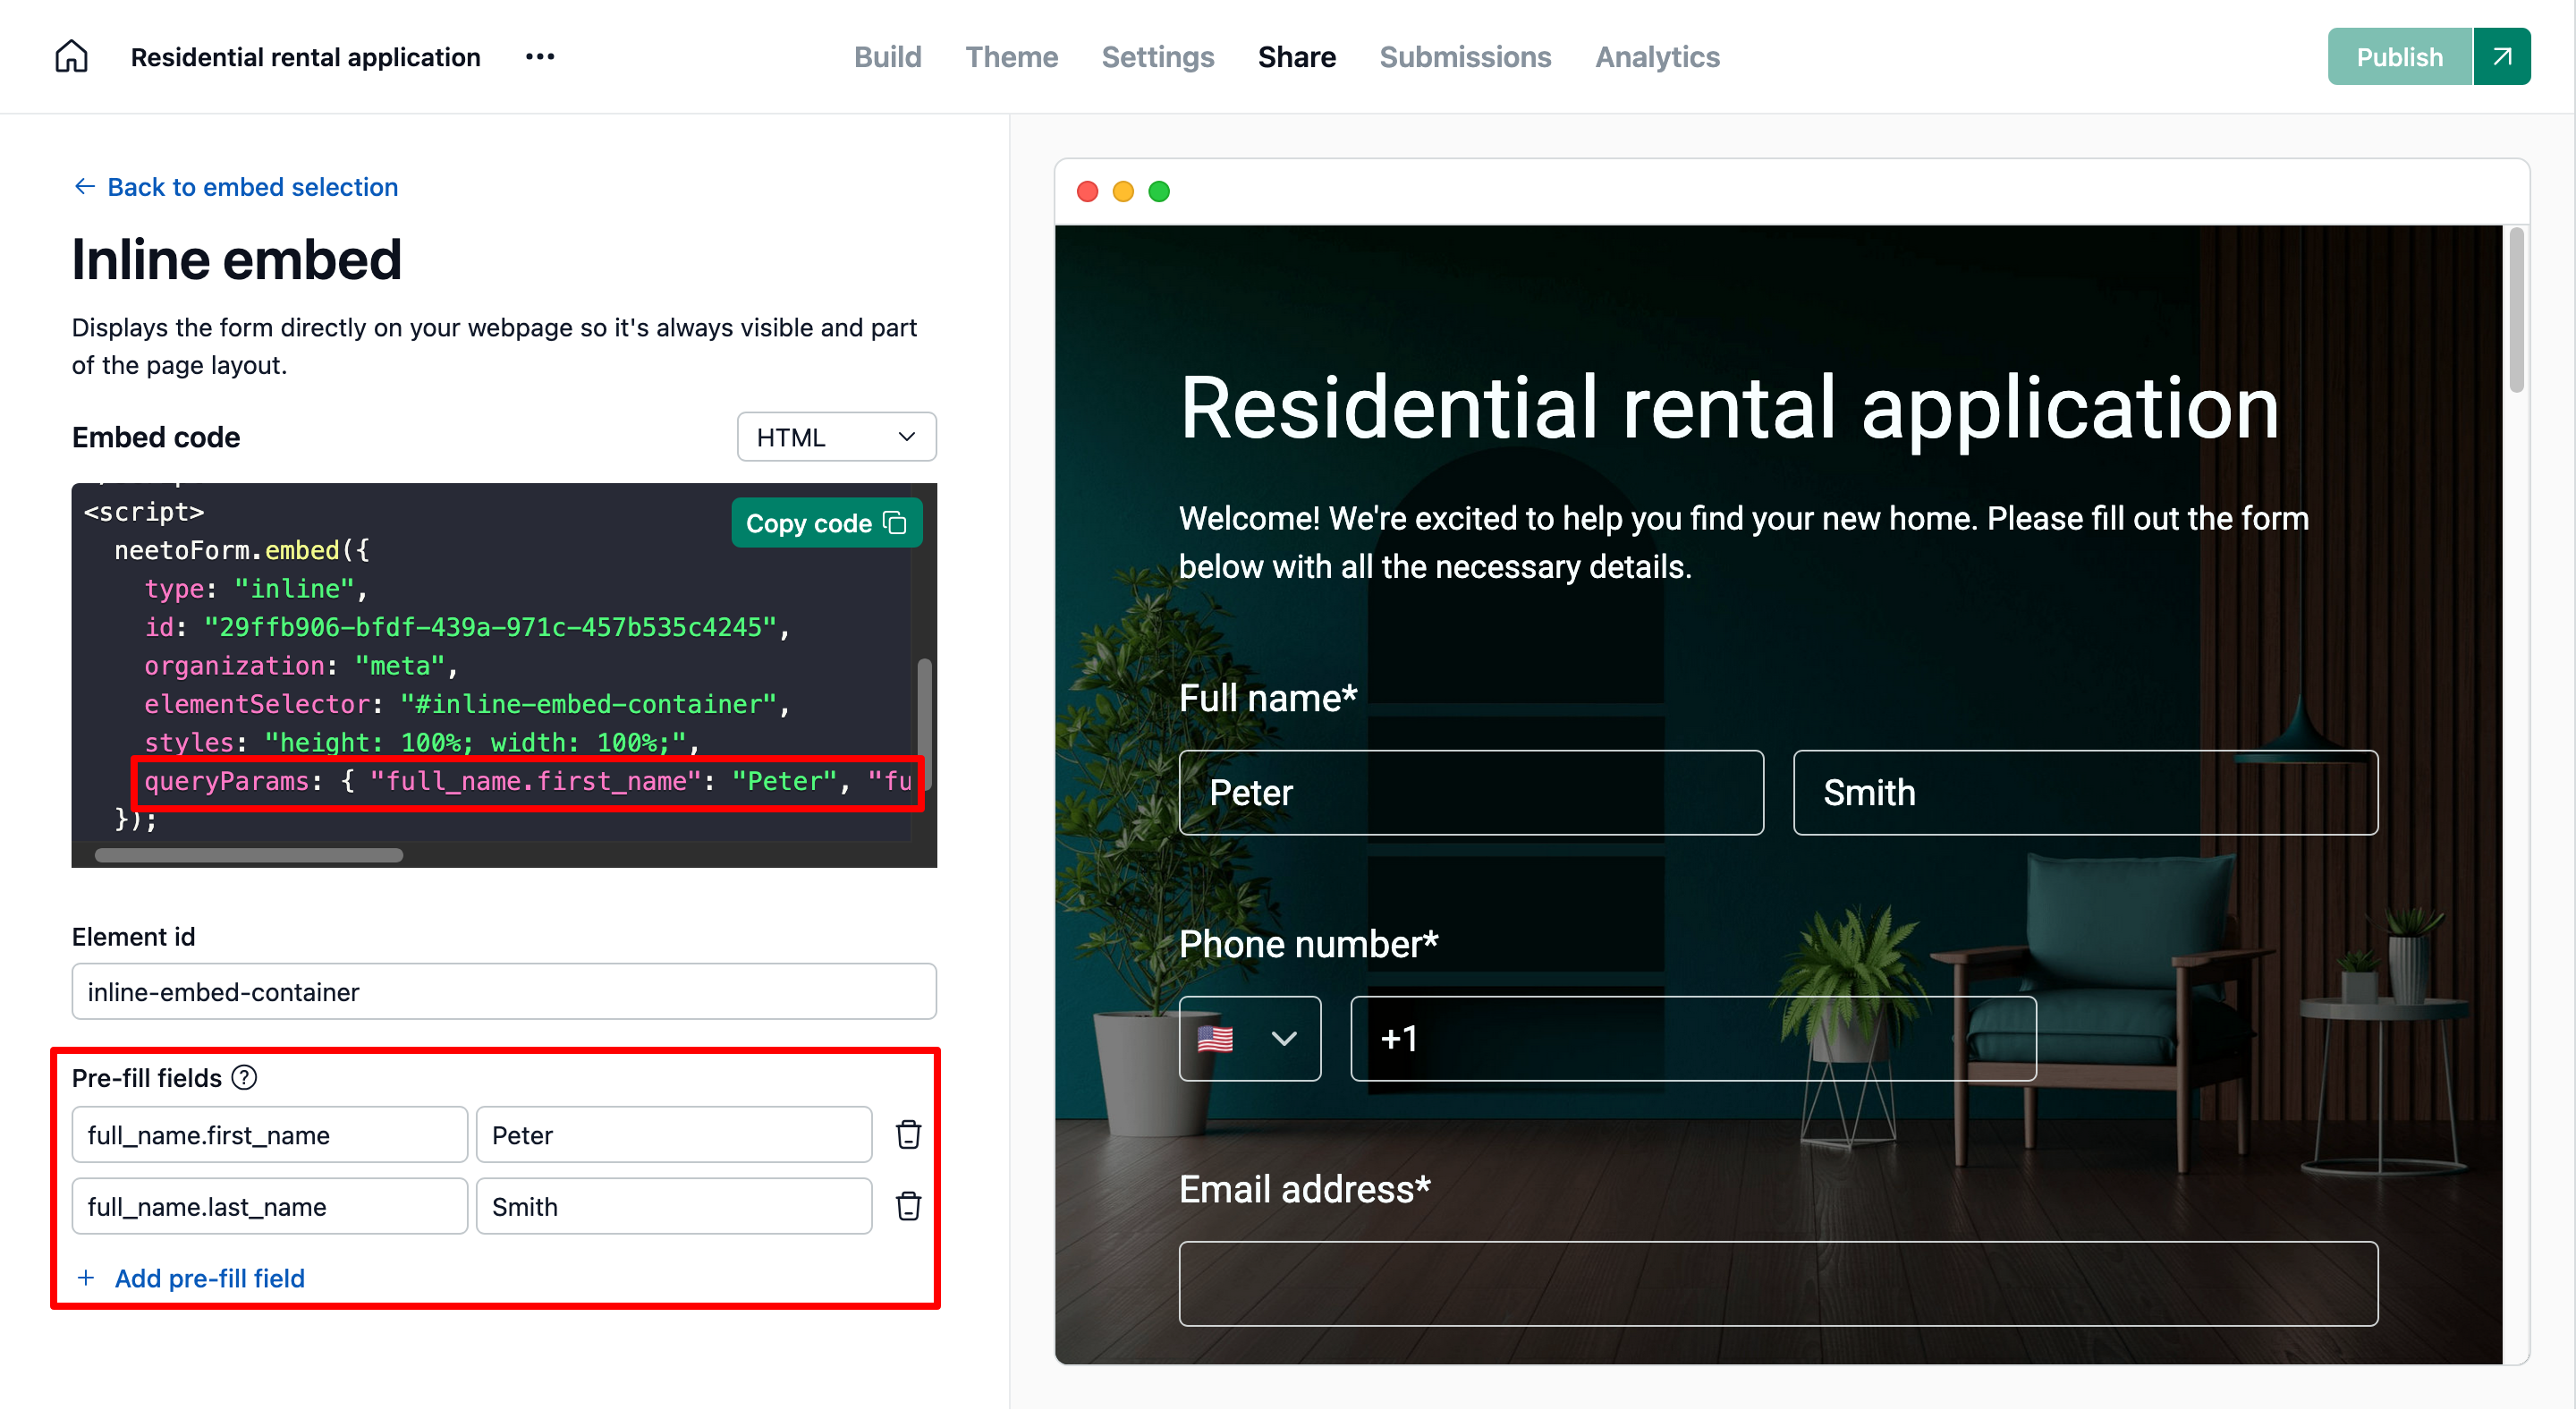
Pre-filled embedded forms
Pre-filled embedded forms allow you to streamline form submissions by automatically populating certain fields with predefined values. This reduces manual input, minimizes errors, and enhances the user experience.
With NeetoForm’s pre-fill feature, you can specify default values for form fields while embedding the form. This is particularly useful when you want to personalize the form for different contexts, ensuring users see relevant information right away.
To use this feature, follow the steps below:
Follow all the steps mentioned above to embed NeetoForm on your webpage.
Locate the Pre-fill fields section under Embed options.
Add the necessary keys and values for the fields you want to pre-fill, ensuring the keys follow the format mentioned in the URL Parameters section. The embed script will automatically update to include the specified pre-fill fields.
Copy the code and embed your form on your webpage.
Use case: Simplifying event registration
When hosting multiple events, organizations often use a single registration form for all events. However, requiring attendees to manually select the event can lead to mistakes, drop-offs, and poor user experience.
By embedding a pre-filled registration form with the event name already selected, businesses can streamline the registration process, making it faster and more intuitive for attendees.
React and NextJS integration
If you want to embed NeetoForm to your React or NextJS app, check out the following examples: