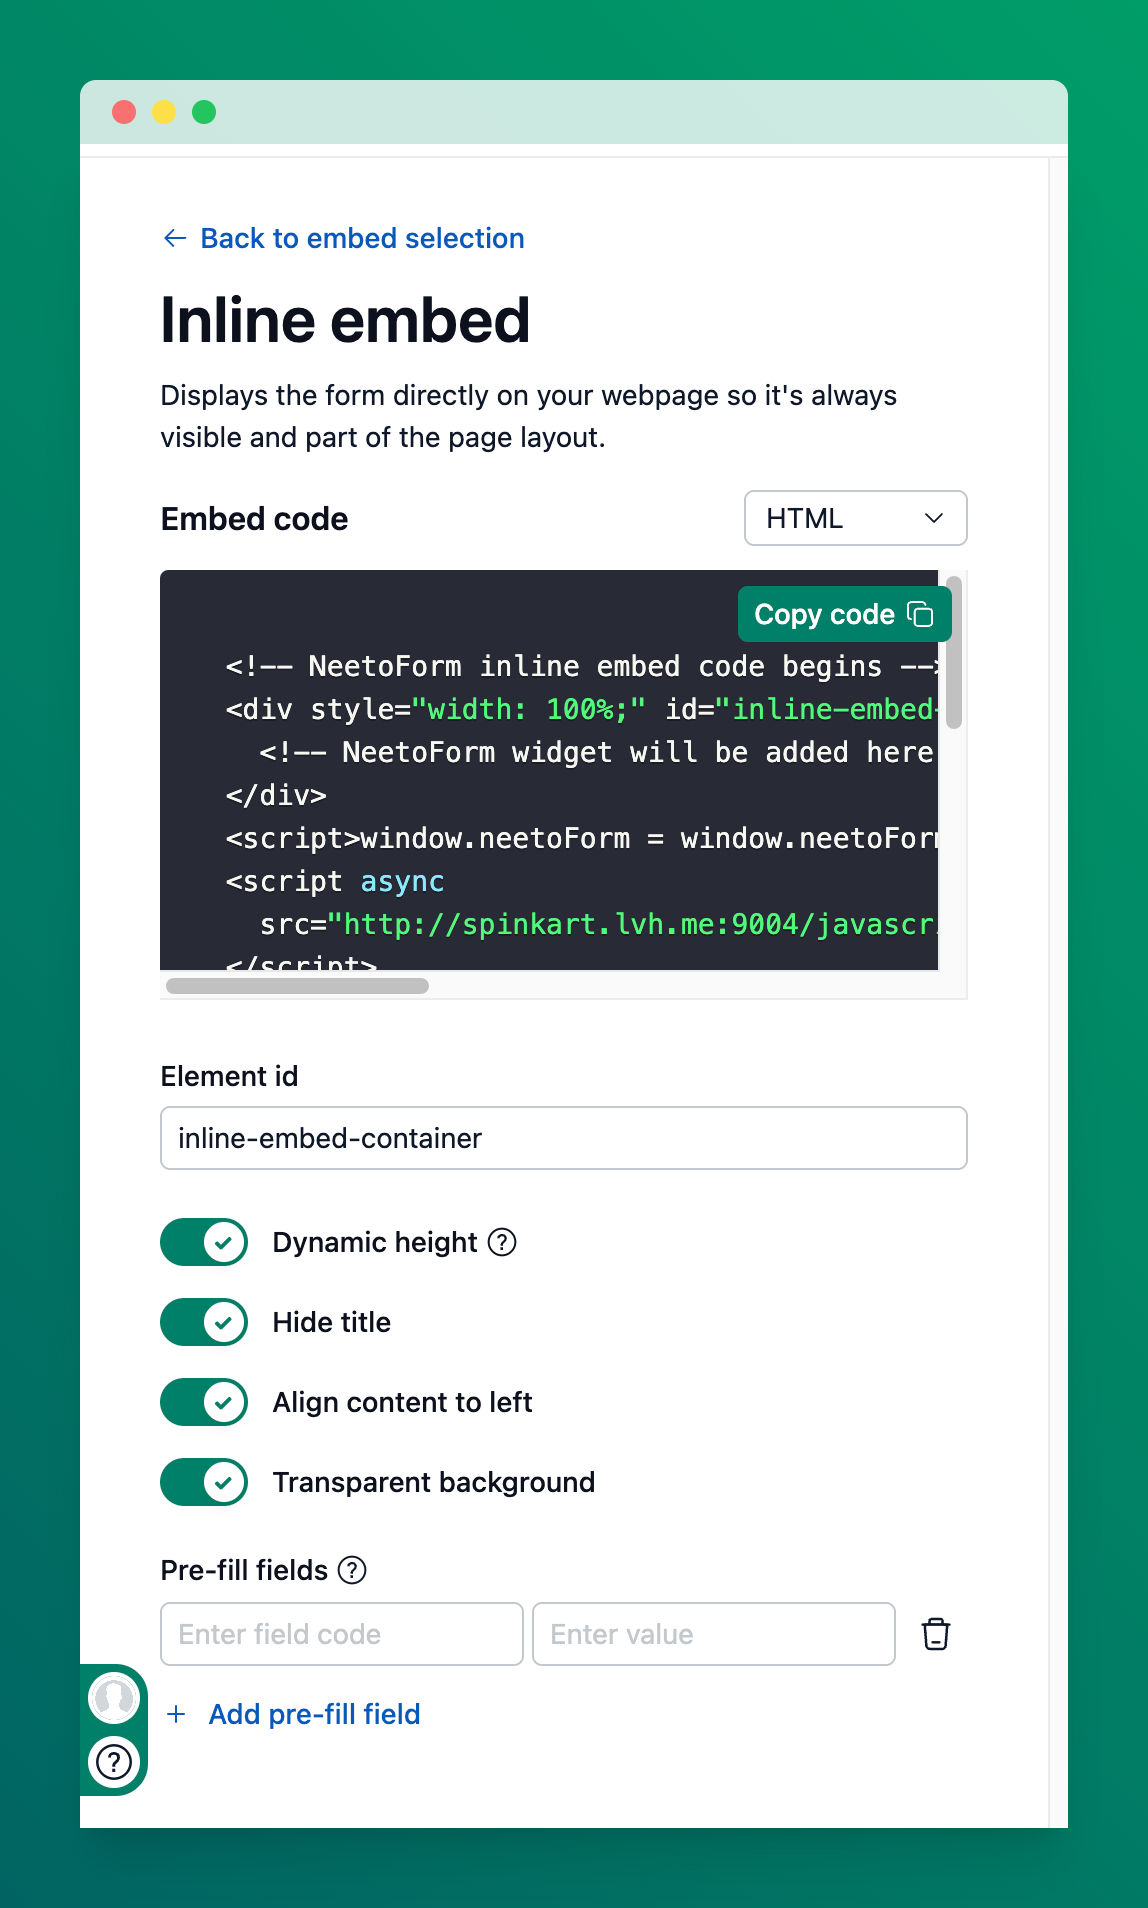
NeetoForm embeds can now be customized to match your website’s design and layout. This guide covers the available options for both inline embeds and iframe embeds, so your forms look seamless and professional. This guide assumes you are already familiar with the basic process of embedding a form as outlined in our main embed article.
Customization options
Toggle any option to the On position to enable it. The embed code at the top will update automatically in real time.
Dynamic Height
What it does: Ensures the entire form is always visible without an internal scrollbar by automatically adjusting the form’s height to fit its content.
Benefit: Provides a cleaner user experience, making the form feel like a native part of your webpage rather than a fixed-size window.
Hide Title
What it does: This removes the default form title from the top of the embed.
Benefit: Helps to avoid redundant or clashing titles if your webpage already has a dedicated heading.
Align Content to Left
What it does: This removes the internal padding from around the form, aligning all form fields to the left edge of the embed container.
Benefit: Allows the form to align perfectly with other content on your webpage, fitting a grid-based or left-aligned layout for a more cohesive design.
Transparent Background
What it does: This makes the background of the form embed transparent, allowing the background color, image, or pattern of your webpage to show through.
Benefit: Creates a truly seamless and professional look, making the form appear as an integrated part of your website, not a separate boxed element.
Embedding the customized code
After you've toggled the options to your liking, click the "Copy" button to get the updated embed code.
Paste this code into the HTML of your webpage where you want the form to appear.
By following these steps, you can create a seamless and professional-looking form that perfectly matches your website's design.

